🧫 What Is Mushroom Liquid Culture?
Liquid culture is a nutrient-rich solution used to grow and store mushroom mycelium – the root-like network that eventually forms mushrooms. Instead of growing on solid agar plates, the mycelium grows suspended in a sterile liquid medium, usually made from water and simple sugars like honey, light malt extract, or corn syrup.
The benefit of this method is speed and efficiency. Once you have a healthy liquid culture, you can easily inject it into sterilized grain or other substrates to start new mushroom colonies. This makes liquid culture an ideal choice for anyone interested in home mycology, gourmet mushroom cultivation, or even small-scale mushroom farming.
🍄 Why Grow Mushrooms Using Liquid Culture?
Using liquid culture gives you several clear advantages over traditional agar or spore syringe methods:
Faster colonization: Mycelium in liquid form is already active and ready to grow.
Easier inoculation: You can inject directly into grain jars or bags using a sterile syringe.
Longer shelf life: Properly stored in the refrigerator, a liquid culture can remain viable for months.
Cleaner results: With fewer handling steps than agar transfers, there’s a lower chance of contamination.
Essentially, liquid culture acts as your mushroom starter kit, letting you scale up quickly and efficiently.
🧪 What You’ll Need
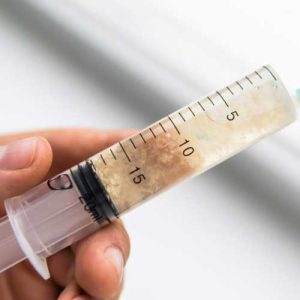
To get started with your own culture, you can use a pre-made 10 mL Gourmet Mushroom Liquid Culture Syringe available from Luna’s Creation Shop on Etsy. It’s pre-sterilized and filled with actively growing mycelium – a perfect foundation for making your own jars.
Here’s what else you’ll need:
1 pint-size mason jar with a self-healing injection port and filter lid (or a simple jar with a loose-fitting lid)
Water (preferably distilled or filtered)
Nutrient source – 4% solution of honey, light malt extract, or Karo syrup
Pressure cooker or Instant Pot for sterilization
Alcohol wipes and gloves for sterile handling
🔬 How to Make Your Own Liquid Culture
Step 1: Mix the Nutrient Solution
Combine 4 grams of honey or malt extract with 100 mL of distilled water in a heat-safe jar. Stir or swirl until dissolved.
Step 2: Sterilize
Screw close the lid, then loosen it a quarter of a turn. Cover the jar lid loosely with aluminum foil and place it in a pressure cooker. Sterilize at 15 PSI for 20 minutes, then allow it to cool completely to room temperature. This step ensures your liquid medium is free from contaminants.
Step 3: Inoculate with Liquid Culture Syringe
Once cool, wipe the injection port (or lid area) with an alcohol pad. Using your 10 mL Gourmet Mushroom Liquid Culture Syringe, inject 1–2 mL of the liquid culture into the jar. Shake gently to distribute the mycelium evenly.
Step 4: Incubate
Store the jar in a warm, dark place (ideally 70–77 °F / 21–25 °C). Over the next 7–14 days, you’ll see thin, web-like mycelium strands forming throughout the liquid. Swirl gently every few days to introduce oxygen and promote even growth.
Step 5: Test for Growth and Contamination
A healthy liquid culture should appear cloudy with white, stringy mycelium floating in the liquid. Any signs of discoloration (green, black, or yellow spots) indicate contamination and mean the batch should be discarded.
🌟 Pro Tips for Success
Always work in a clean environment, ideally near a still-air box or flow hood.
Label each jar with the mushroom species and date of inoculation.
If stored in the fridge, swirl gently once a month to keep the mycelium active.
🪴 Ready for the Next Step?
Once your culture is fully colonized, it’s time to put it to use. In Part 2, we’ll show you how to inoculate sterilized grain jars using your liquid culture — a simple, efficient way to start mushroom growth with minimal contamination risk.